If you read Emergency, you’ll remember there was an urban survivalist who ran onPoint Tactical Training, who taught me how to pick locks, hotwire cars, escape from handcuffs, and so many more just-plain-cool survival skills. That survivalist is Kevin Reeve.
Upon hearing that parts of California are evacuating in record numbers (including my community in Malibu) due to the unprecedented wildfires, Kevin sent me a reminder of his best advice.
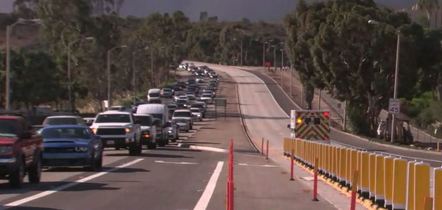
As I write this, it’s been 24 hours since the evacuation orders and the fires are still growing.
I don’t know if my house is still standing. Over 100,000 people have already been evacuated.
…I can only imagine there will be more to come.
So with Kevin’s permission, I’m posting his top advice on how to safely evacuate.
-Neil
P.S.
Remember, the disabled, the elderly, and pets are the most vulnerable in these situations.
Evacuation Considerations
By Kevin Reeve
Part One: What to Take
With fire season in full force in California, many people are being forced to evacuate with little notice. I do a scenario in the Urban Evacuation class where I give my students 10 minutes to come up with a list of the things they would take with them in the event of a forced evacuation. They must also list the location of the items in their house. It is an eye-opening lesson for them.
Most have little idea what they would gather, even less idea where it is. If you add the stress of an actual evacuation, the ability to focus is further impaired. People make terrible decisions. Things get overlooked and forgotten.
What do you take? How do you prepare for an evacuation in advance? The answer is to make lists of what you will grab and then collect it and store it in an easily accessible location.
What is the most critical thing to take? The thing that is hardest to replace.
My brother lost his house to a fire. It burned to the foundation. When I asked him what he regretted losing the most, he said his family photos and heirlooms. Not what I was expecting, but after consideration, it made sense.
So I started thinking about what meant the most to me, and what I would want to take. I break it into two categories, the practical and the sentimental…
THE PRACTICAL:
Things that are essential to preservation of life and wealth preservation.
Documents – financial records, deeds, birth certificates, stock certificates, car titles, social security cards, passports, any documents that would be difficult to replace.
Medications – especially life preserving medicine, such as insulin.
First aid kit – big enough to care for injured family members.
Shelter – either a tent or some other form of protection from sun, wind, and rain. Sleeping bags or blankets to keep you warm in cold weather.
Water – a few gallons of stored water in one gallon containers for easier transport. Plan on at least two gallons per person. Additionally, I would recommend a water filter to assist in replenishing supplies. Water is heavy to carry and a filter allows you to carry less.
Fire – maybe not a campfire, but a stove or some other means of cooking.
Food – freeze-dried meals are the lightest and easiest. Canned food works great too, it is just heavier.
Investments/high value items – this would include jewelry, precious metals, art, antiques, coin or stamp collections, and other items of high financial value.
Computer hard drives – this is less important than it used to be IF you back up your data with cloud storage. But, if you’re not backing up to cloud or if you run a business from home, you might really need that laptop, and all those external hard drives.
Phone charger – ideally, one that can be charged in the car adapter.
Clothes – a change or two of clothing, personal items, as well as any means of staying warm, like a coat, hat, gloves.
THE SENTIMENTAL
Items with high emotional value that are not necessarily life-preserving, but are items that you don’t want to lose.
Family photos – with the option of digitizing old photos and the prevalence of digital cameras, this may be less important in the future. But right now I have a few totes with pictures that I could never replace.
Family history items – old letters, diaries, journals, kids art projects, things we just don’t want to let go.
Heirlooms – antiques, china, silver, grandma’s rocking chair. These absolutely cannot be replaced.
DECISIONS DECISIONS:
There is no way to take it all.
In our given scenario, you have two vehicles to drive out, a mid-sized car and an SUV. Given the space restrictions, you won’t be able to take everything. So now you have to make some decisions…
Create a staging area behind the vehicles so you can make decisions about what to bring.
If you have organized your essential gear in advance, it can go right into the vehicles. This assures you that you will have what you need to survive.
Then you have to make some very fast decisions about what parts of the emotional pile you want to save. Size and weight will be an issue.
I have items that are sentimental, but certainly not irreplaceable. For example, I have a nice mountain bike. Unless it has survival value, it gets left behind. Expensive to replace, but not irreplaceable. I have a few totes of photos. Irreplaceable, so they will probably go. I have some memorabilia from my days in Scouting. Sentimental, but if given a choice between that and a survival tool, the tool always goes.
CHECKLISTS:
Without a checklist, you will forget something important.
I have a love/hate relationship with checklists. I dislike the effort and time required to make them, but I hate the inconvenience or even tragedy that follows when I do not have what I need even more. As we age, memory and recall decline (and even more-so in a situation of panic). Lists and reminders are paramount.
Write lists on paper—don’t waste your phone’s battery writing them in “notes.”
The advantage of a checklist is that you have already made the decisions about what to take. All you have to do is gather it. This really frees your mind to think about more important things like friends and family members.
So I sat down and created a list that will allow me to prioritize my packing if I have one car, or the SUV, and if there is time, the trailer.
The other key to evacuating safely is that the items on your “must have” list be gathered and packed ahead of time for sudden evacuation. I use plastic totes to keep stuff together. Admittedly, some stuff cannot be pre-packed because it is in use. But I can save a lot of time by packing some essentials in advance.
My student and his family were faced with evacuation when a wildfire burned down homes on an adjacent street. Their evacuation bins were prepped and stored in the garage. After the alert by the sheriff, they quickly loaded the cars and drove out of the neighborhood right behind the sheriff’s vehicle, much to the amazement of neighbors who were still packing in a frenzy.
NO PLAN B:
List it or lose it
Waiting to do any of this until the fire is at your door invites a bigger tragedy, on top of the disaster of potentially losing your home, or even your life.
Let me emphasize: none of your possessions are worth dying for. Forsake all if necessary to preserve life.
Part Two: Actually Getting Out
VEHICLE PREPARATION
Make sure your vehicle is properly maintained—don’t fall behind on routinely changing the fluids in your car—oil and coolant are most vital, but automatic transmission fluid and brake fluid are important as well.
Keep the tires inflated and balanced and the front end aligned. Replace the wipers annually, and keep the washer tank filled. Keep your vehicle gassed up. Always refill when you get to half a tank. Store at least one Jerrycan of gasoline per vehicle to help get you out of the crisis zone. Two or three is even better. A roof rack to carry additional items and the gas cans would be a great addition.
If you have a hybrid or an electric car, plan ahead to keep your vehicle energized. Expect a lot of gridlock/stop-go traffic on your way out of town—this eats up fuel faster than usual.
ROUTE SELECTION—THE SECRET KEY
In my Urban Evacuation class, we spend time studying maps for the purpose of selecting routes. The first step is identifying the end destination. As the Cheshire Cat told Alice: “if you don’t know where you are going, it doesn’t matter which road you choose.”
The destination may be the home of a relative who lives outside the crisis zone.
It may be a hotel in a distant town.
It may be a vacation home or cabin, or it may just be a campground.
Ideally, your location will provide you with shelter, water, warmth, and food. It should also be a safe place.
Then with the end in mind, you can determine the route.
First pick a primary route. This should be the most direct or fastest route out of the crisis zone and can include freeways.
Then select a secondary route, staying off freeways and main highways.
Back roads and byways may increase travel time, unless there is massive evacuation of a city. Remember, all the freeways and highways will be clogged with other evacuees. Road closures will occur. Use your car radio to keep track of road closures. If you have internet access, get informed with traffic updates online. And stay informed.
DRILL, DRILL, DRILL – TRYING IT ALL OUT
Amateurs assume they don’t need to practice.
Beginners practice until they get it right.
Professionals practice until they cannot get it wrong.
Just thinking about doing something (while better than nothing) does not prepare you for the stress of an evacuation.
Drill #1
With your packing list prepared, see how long it takes you to gather all your designated items, and load them into the car. If you have pets, you will need to consider space for them to travel, as well as their own food and water.
Give yourself twenty minutes to drill this.
Then practice it again later, trying to reduce the time.
Hint: after one trial, you will have things better prepared and your time will drop.
Drill #2
With paper maps, drive the first twenty miles of your primary and secondary routes.
Time is important, but note other resources and difficulties: mark on your paper map some locations for refueling on the route, as well as locations for restocking on food and water.
Be wary of difficulties such as severe traffic chokepoints that slow your movement (construction, for example).
After you have driven the pre-planned routes, one will emerge as your favorite. It may be that you have to go back and start over as all the selected routes have showstopper problems…but drill it until you know which route to take under different circumstances.
Of course this prepares you to evacuate in case of fire, but what about other situations? The same principles apply whether the crisis is an earthquake, hurricane, or dangerous riots. You have to adjust route selection—and staying informed will help you make the smartest decision.
RECAP
The stress of trying to decide what to take, where to go, or what route to take is going to result in you forgetting key items, getting stuck in traffic, or worse, getting caught up in the actual disaster.
One of my favorite sayings is that reality removes romance. Some of us have romantic notions of being the heroic person who leads their family to safety. If you have not prepared and reality sets in, those romantic hero notions will evaporate.
I hope this helps you and your community. Take care of each other and Godspeed.